
Arduino IoT Kit Air Quality Monitor Project
Build a cloud-connected air quality monitor with the Arduino Explore IoT Kit, featuring real-time AirNow API integration and sunrise/sunset tracking.
Heroku sponsored an IoT workshop at our recent CascadiaJS conference. Participants were sent a free Arduino Explore IoT kit to play with prior to the kit being available publicly.
Update: The Arduino Explore IoT kit is now available for purchase.
The workshop started with a nice introduction to the Arduino and how to connect to the Arduino IoT Cloud by Ubi de Feo. Arduino and Heroku also provided code to help people get started, links are below.
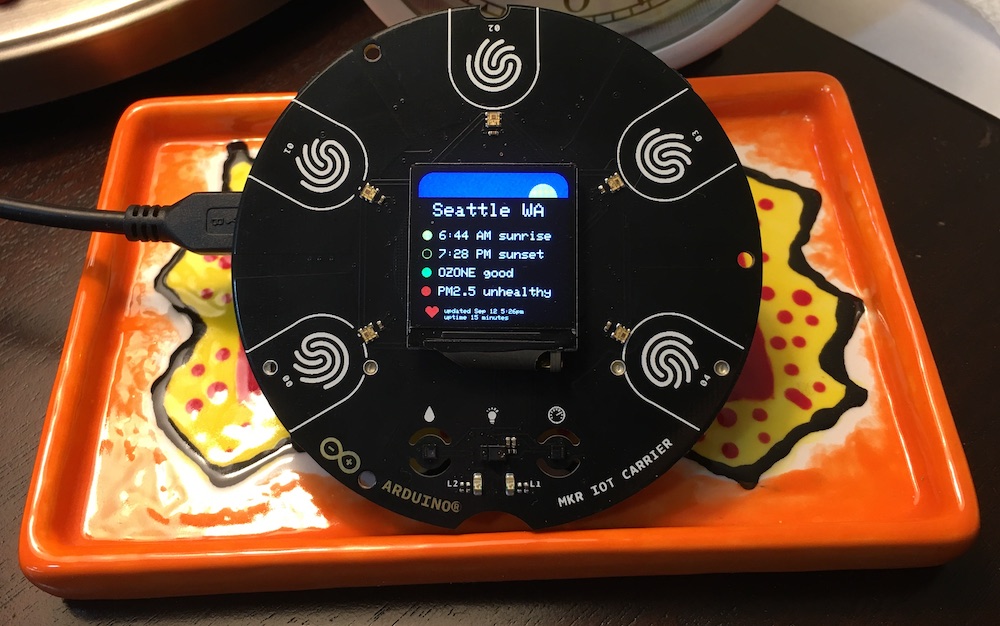
I created my own appliance to receive and display air quality and sunrise/sunset information.
In this article, I'll walk through what the kit contains, how to get started, provide links to example code, discuss some helpful information I found along the way, and wrap up with a Thank You to the workshop organizers.
What is the Arduino Explore IoT Kit?
The kit is:
-
an MKR WIFI 1010 Arduino that supports direct WIFI and Bluetooth access
-
a brand new MKR IoT Carrier Board which has many sensors and actuators built-in. It includes a 240x240 color display, touch sensors, temperature gauge, humidity gauge, pressure sensor, LED lights, a light sensor, accelerometer, gyroscope, buzzer, relays, SD card, and a battery holder. Plus a separate PIR sensor and plant moisture sensor.
Just plug the two together (and sprinkle in Arudino IoT Cloud features) and you have a platform to easily gather data from sensors, send it to the cloud securely, edit/display/graph data via a web dashboard widgets, and send data back from the cloud to the device.
Getting Started with Explore IoT Kit
Run through the official Explore IoT Kit lessons. They walk you through building a number of projects that involve the hardware and the Arduino Create IoT Cloud.
When you're done, you'll understand how all the pieces work, and will be ready to tackle your own projects.
Workshop Examples
Arduino and Heroku created projects for the workshop to help people get started:
-
The Arduino team wrote an example Node.js app that shows you how to read and send data to Arduino IoT cloud endpoints.
-
The Heroku team created a tutorial for an "On Air" indicator for your home along with corresponding Node.js app.
Project to Monitor Air Quality and Sunrise/Sunset Times
For my project I wanted to send information from the web to the device and display it there.
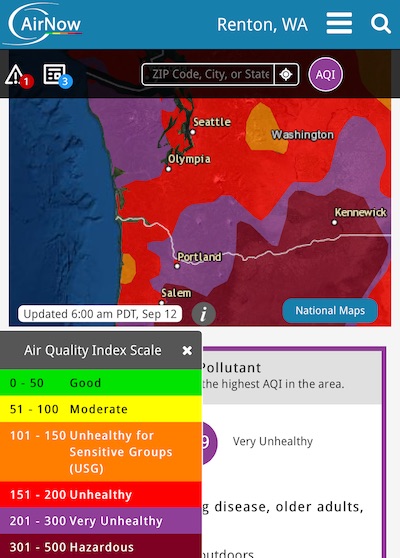
Originally my focus was on sunrise, sunset and moon phase information. Today in the Seattle area (and in most of the US west coast) air quality is very low due to the large number of forest fires in WA, OR and CA so I decided to add Ozone and PM 2.5 pollutant levels using the AirNow API.
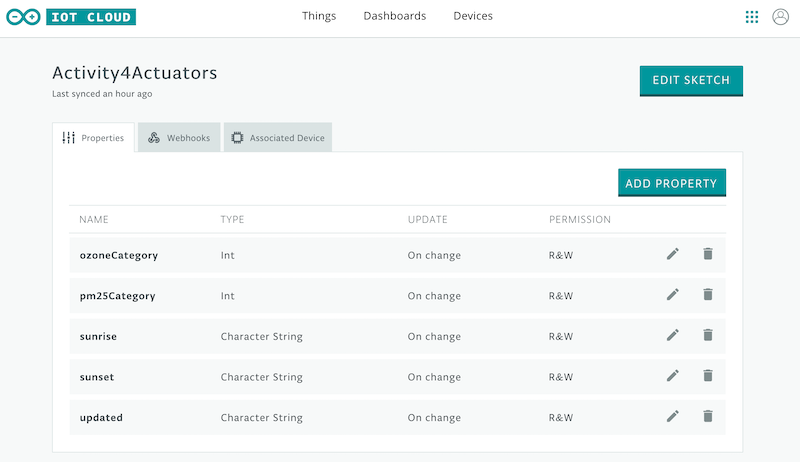
The Arduino IoT Cloud is the glue that connects your web service and the IoT device together. You create properties and dashboards on the web, and you can then send data back and forth between the web and the device.
So the major steps are:
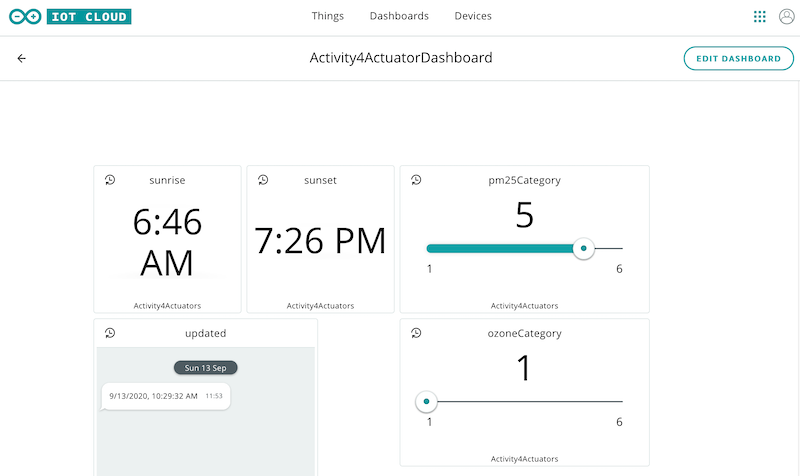
- Setup properties and create a dashboard of widgets on IoT Cloud.
-
Auto-create an Arduino Sketch (
Edit Sketchbutton in above screenshot) and edit it online with web-based Arduino Editor. Here is my Arduino sketch that displays the data on the Arduino. -
At this point, you have a working device connected to the cloud, and you can manually update properties in the IoT Cloud Dashboard and see your device update as they change!
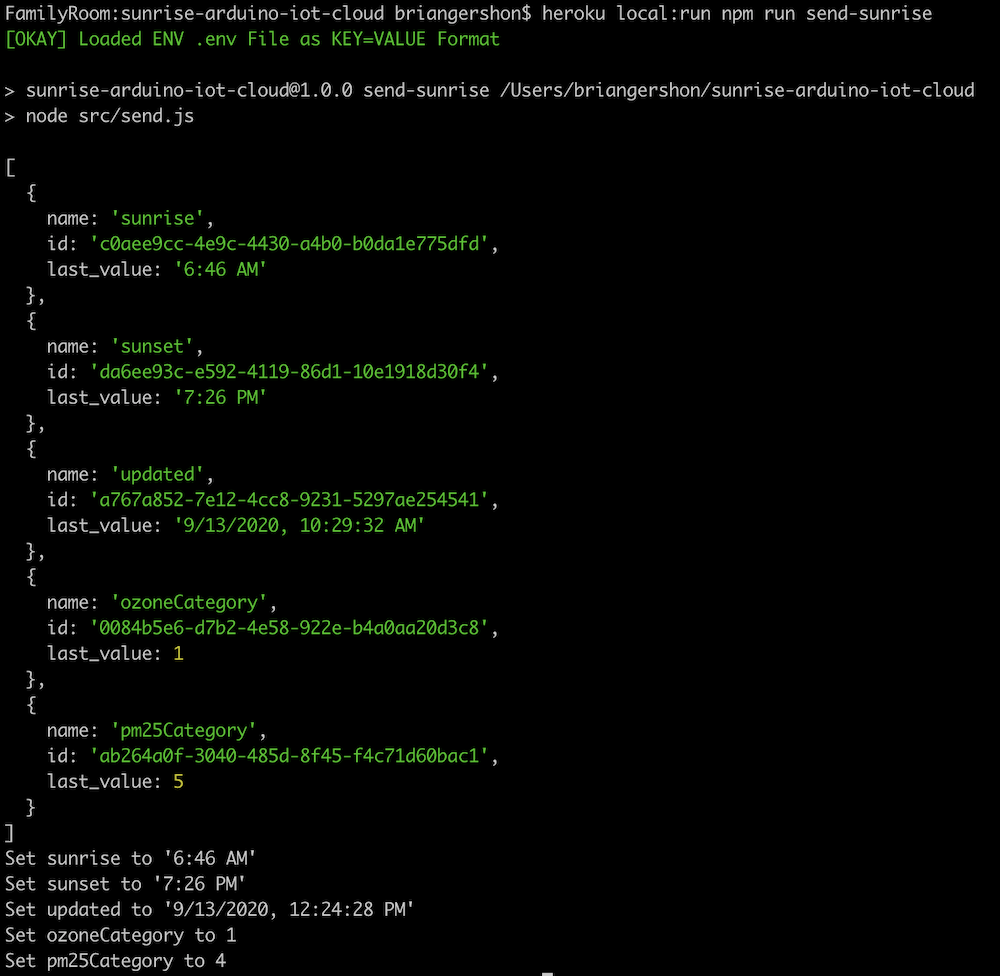
- Write an application that gathers the data you need and update those same properties programmatically. I wrote a Node.js service hosted on Heroku which calculates sunrise/sunset and also gathers air quality information from the AirNow API. I scheduled a recurring task that grabs latest data and pushed it to the IoT Cloud. My code can be found at github.com/briangershon/sunrise-arduino-iot-cloud.
Helpful information I discovered along the journey
Here are discoveries I made along the way.
How to Update the Firmware
The device notified me (in a serial port message) that my firmware was out-of-date and recommended to update the firmware to v1.4.1. Mine was v1.2.3
Can I update using the online sketch editor? The answer is no from what I can tell. You need to download the actual Arduino IDE.
Also when I downloaded the latest stable version of IDE, it didn't have the newest beta firmware.
Here are the steps to upgrade:
-
Download an hourly build of the IDE. It's not recommended you use the non-release IDE for day-to-day development, but the hourly builds have the newest device firmware versions. Though if you do indeed want latest stable version, just download the stable version of the IDE.
-
Follow the WiFiNINA Firmware Updater instructions.
Color Display Features
I couldn't find much info about the display. The lessons had example code, but didn't mention the resolution, and only demonstrated displaying text. I wanted to draw graphics as well. Playing around, I discovered it's a 240x240 display.
Arduino nicely leverages existing libraries and I discovered the Adafruit GFX Graphics Library reference and commands like drawLine(), fillCircle() and fillRoundRect(). e.g. carrier.display.drawLine(5, 5, 100, 100, ST77XX_WHITE);
Updating IoT Cloud Programatically
This was my first experience using Arduino IoT Cloud and it went well.
To programatically update properties from a JavaScript application I discovered IoT Client JS example project. The README explains how to get your Client ID and Client Secret from Cloud IoT. I created a pull request with a couple of tweaks.
Though later I discovered a higher-level arduino-iot-js library that I'd use next time.
Visit the general API Docs for additional help, as well as to find Python and Golang libraries.
Thank you
I appreciated the opportunity to play with Heroku, Arduino Explore IoT kit, and Arduino IoT Cloud -- and pulling all of this technology together into a cloud-powered IoT device. I'm inspired by the CascadiaJS, Arduino and Heroku communities and look forward to my next project!
Thank you Ubi de Feo and Francesco Stasi from Arduino, and Julián Duque, Chris Castle, and Jennifer Hooper from Heroku.